
Sunday, May 15, 2011
Lily Pad Challenge Kathy's Color Throwdown
Saturday, April 30, 2011
Lily Pad Card Chain Challenge
Here is my card for May's Card Chain Challenge by Lily Pad Cards. I will mail it to someone - I don't know who yet and then I will get one from someone else! Fun huh?!
 This is hand stamped in chocolate and colored with copics. I added a little Flower Soft and glitter to the center of some of the flowers. Hope you enjoy it!

Tuesday, April 26, 2011
Cover Lover Challenge Lily Pad Cards
Hello!
Thanks for the visit. This is a card inspired from
the Cover Lover Challenge at the
Lily Pad Cards using this book cover.

and here is my take on the card.

for the visit!
Friday, April 22, 2011
Lily Pad Challenge With Penny Black

Monday, April 11, 2011
Lily Pad Color Challenge

Wednesday, March 30, 2011
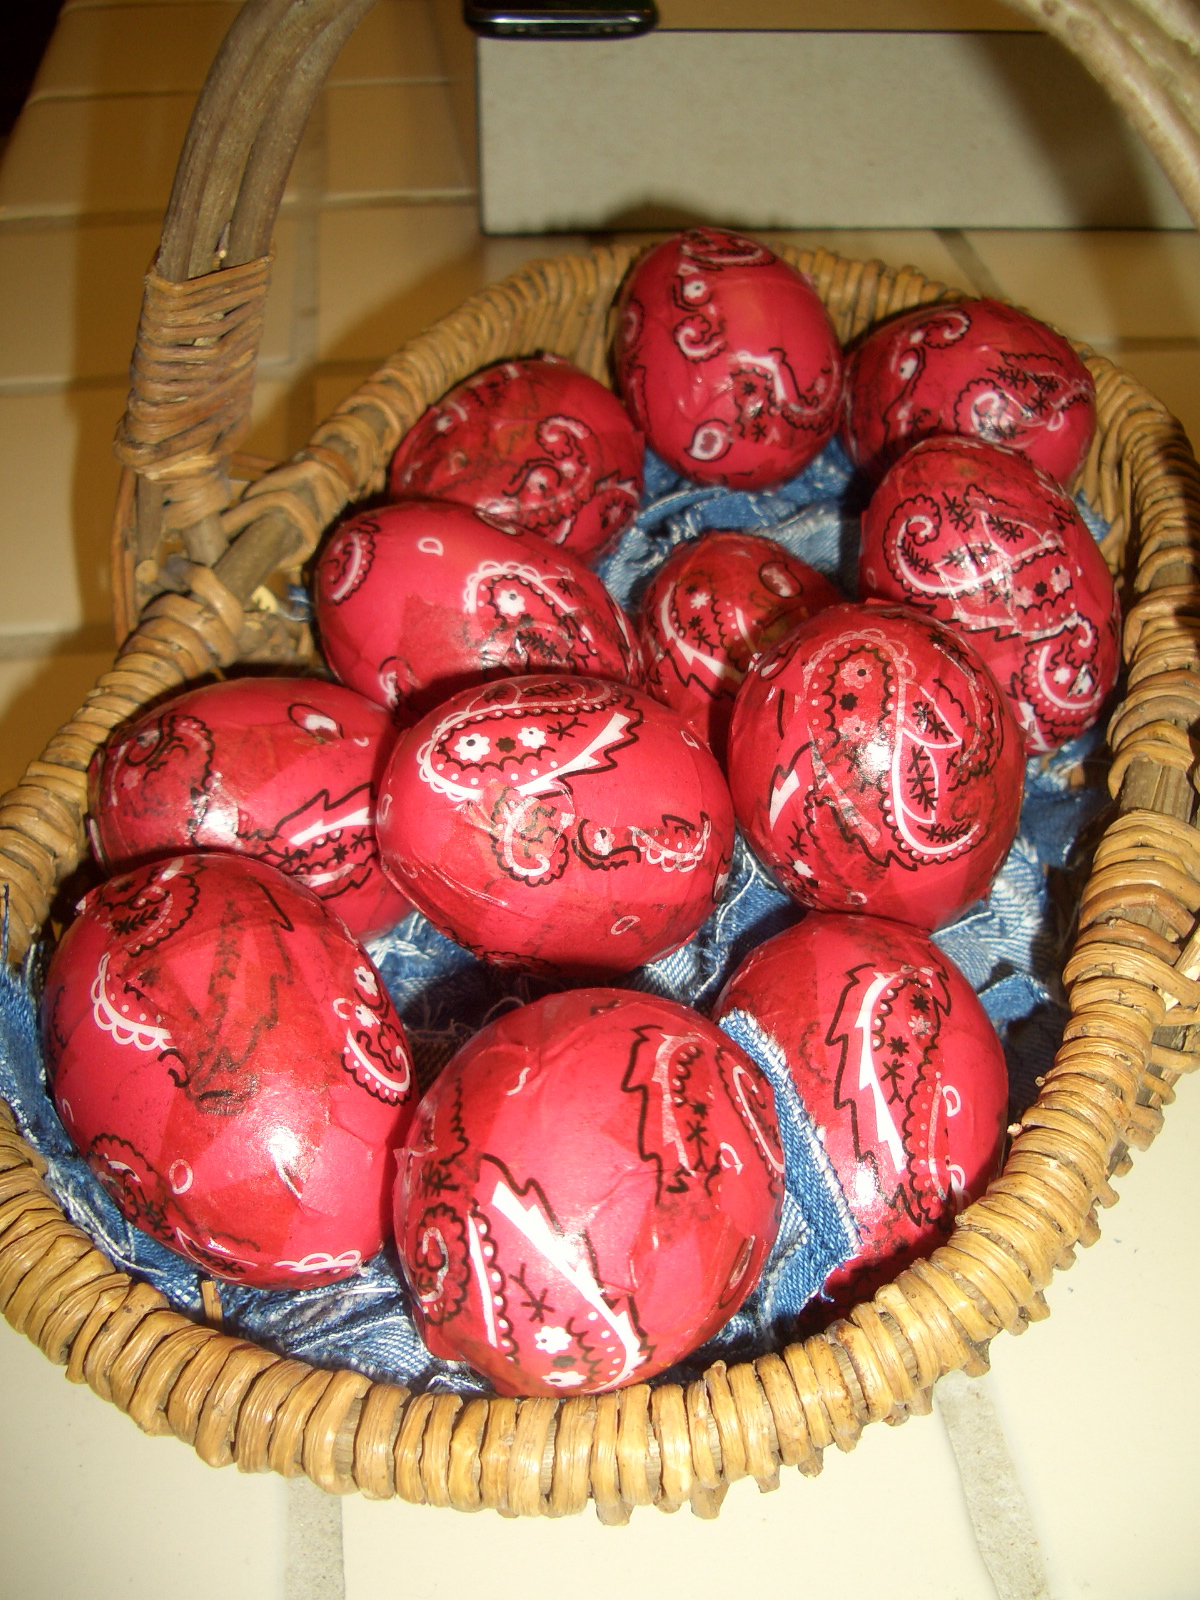
Not your MAMA's Easter Eggs!
 |
| Finished Eggs on a nest of Denim! |
 |
| Cut tissue strips |
 |
| Out of any kind of tissue you want. |
 |
| They are about 5 inches by 1.25 inches. |
 |
| Get some white plastic eggs. |
 |
| Use any glue, this is what I used and water it down. |
 |
| Here are the supplies ready to go! |
 |
| Dip the tissue into the watered down glue. |
 |
| And wrap around the egg. Continue until it is covered |
 |
| Let them completely dry on a rack. |

 |
| Then put them in a basket with some grass! |
 |
| Enjoy! |
Thursday, February 24, 2011
Baseball Baby Shower


Sunday, August 22, 2010
GLITTER
I had alot of fun playing with my new glue today unfortunately I now have glitter all over me!!
These are very fun, I used a transparency film, stamped with Staz-On and then used my glue to coat the surface, added glitter, and let them dry. They will all find homes on cards soon.


Friday, July 23, 2010
Dipping Cake Balls the easy Way!
Ok, I have baked my cake, mixed in my frosting and then made cake balls with a 1 inch scoop. I place them on parchment paper lined trays and put them in the freezer for several hours. I don't like to use the spoons and this is the easiest way I have found to dip the cake balls.
Place your melts into the Wilton melter, I have tried microwaving, this works the best for me. You can get them at Wal-Mart or Michaels. They have two settings melt, and warm.
Your melts are now all smooth and melted! Ready for the dipping!
Skewer your frozen cake ball with the bamboo skewers you can use for the grill.
Dip your frozen cake ball into the melts! Tap it off. Give it a little swirl as you finish.

Place the dipped cake ball onto a tray with parchment paper added.
When you pull the skewer out it leaves a hole soooooo..........
Have a bowl of sprinkles or sanding sugar ready to dip your cake balls in!
Redip the cake ball into the melts!
After you dip them in the melts, you dip them in the sprinkles!

This is what they look like finished and ready to eat!

Place your melts into the Wilton melter, I have tried microwaving, this works the best for me. You can get them at Wal-Mart or Michaels. They have two settings melt, and warm.

Your melts are now all smooth and melted! Ready for the dipping!

Skewer your frozen cake ball with the bamboo skewers you can use for the grill.

Dip your frozen cake ball into the melts! Tap it off. Give it a little swirl as you finish.

Place the dipped cake ball onto a tray with parchment paper added.

When you pull the skewer out it leaves a hole soooooo..........

Have a bowl of sprinkles or sanding sugar ready to dip your cake balls in!

Redip the cake ball into the melts!

After you dip them in the melts, you dip them in the sprinkles!

This is what they look like finished and ready to eat!

Saturday, March 6, 2010
Thinking of You! Sketch 54
 This card was fun and easy to do! I already had the artwork ready to go! I stamped the polka dot background on the green, and inked the edges of the pink. I tied the button underneath with waxy flax. Hope you enjoy it!
Monday, March 1, 2010
Wild Card

 I love the animal print on this card! I saw a Christmas ornament that was like this and used it for the inspiration! You just never know where you will find good ideas!
Sunday, February 21, 2010
Fingerless Mitts


 I bought this yarn at a very cool craft store in Kansas City a couple of weeks ago and they included the pattern for these cute fingerless mitts!
 They were super easy and they are warm too!
Subscribe to:
Posts (Atom)